How to Track Body Measurements: 5 Sites, Every 4 Weeks
To track body measurements, use a tape at the same five sites every four weeks: waist, chest, hips, biceps and thigh. Measure each twice and log the average by date. Trust a change more once it beats your own repeat spread, our rule of thumb. In the example below, a waist of 88.0 cm falls to 85.0 cm.
On this page
How to track body measurements in five steps
- Pick your sites. Waist, chest, hips, biceps and thigh cover most goals. Use the same ones every time.
- Fix the exact spot. Choose a landmark for each site and keep it. The waist is the one that moves around, so it gets its own section below.
- Measure twice. Take two passes at each site and log the average. For arms and legs, measure the same side every time.
- Repeat every four weeks. Same time of day, same state: morning, before you eat, relaxed.
- Judge the change against your own spread. If two passes differ by 1.0 cm, a 1.0 cm change means nothing yet.
Steps 2 to 5 are a practical routine, not a protocol from a study. Its point is repetition: the tape only tells you something if the second measurement is made like the first.
Pick one waist site and never change it
The waist has no single agreed spot. A 2020 consensus statement on waist circumference names two protocols as probably more reliable and feasible (Ross et al., 2020). One is the midpoint between the lowest rib and the top of the hip bone (WHO). The other is the top of the hip bone (NIH).
The two can disagree. In the studies the statement reviews, the gap was small for men. For women it ranged from about 2 cm to about 9 cm, depending on the sample. A gap that size can swamp a real 3 cm change, so the two are not interchangeable. Choose one site and never switch.
A third option is the navel, usable if you never switch, though the consensus statement did not recommend it. The landmarks below use the navel for the waist. They are practical, not a study protocol, and what counts is repeating them.
| Site | Where to put the tape | Keep the same |
|---|---|---|
| Waist | At the navel, relaxed | One site only, and a normal breath out before reading |
| Chest | Across the nipples | A normal breath out |
| Hips | Around the widest part of the glutes | Feet together |
| Biceps | Flexed, around the peak | The same arm every time |
| Thigh | Around the widest part, just below the glutes, standing | The same leg, standing |
Common mistake: Pulling the tape tight on one day and loose on the next. Keep it level and snug against the skin, without denting it.
Measure twice and find your own repeat spread
Your hands, the tape and your posture all move the number a little. Measure that movement once and you know how much change to ignore.
Once, at the start, take three readings in a row at a site. Say your waist gives 86.0, 86.5 and 85.5 cm. The average is 86.0 cm, and the spread from lowest to highest is 1.0 cm (0.4 in).
Those figures are an example, not a standard. Do the same at each site, and write the spread down. After that, two passes per visit are enough.
As a rule of thumb, treat a change smaller than your spread as noise. Your spread comes from one sitting, so day-to-day swings add more. The further a change goes beyond it, the more you can trust it.
Read the change over eight weeks, not one
Here is an example log with illustrative numbers, in cm, taken every four weeks. Assume the same 1.0 cm repeat spread at every site, to keep the maths short.
| Site | Week 0 | Week 4 | Week 8 | Change | Against a 1.0 cm spread |
|---|---|---|---|---|---|
| Waist | 88.0 | 86.5 | 85.0 | −3.0 (1.2 in) | Likely real: three times the spread |
| Hips | 98.0 | 98.0 | 97.5 | −0.5 (0.2 in) | Not yet: half the spread |
| Chest | 101.0 | 101.5 | 102.0 | +1.0 (0.4 in) | Not yet: equal to the spread |
| Biceps | 35.0 | 35.5 | 36.0 | +1.0 (0.4 in) | Not yet: equal to the spread |
| Thigh | 58.0 | 58.5 | 59.0 | +1.0 (0.4 in) | Not yet: equal to the spread |
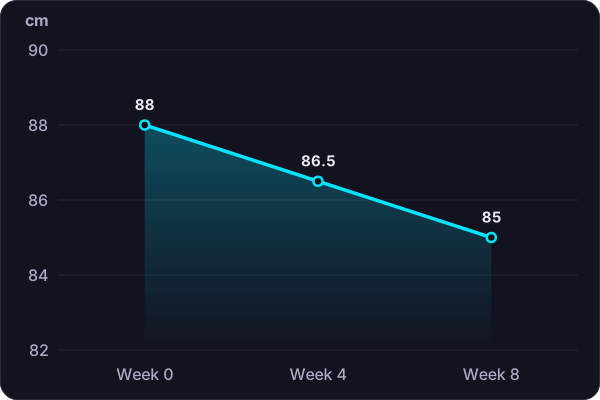
The waist result is the only one that clearly beats the spread so far. The chest, biceps and thigh each rose by a spread's worth, which is a promising direction rather than a result. The hips moved half a spread, which is nothing yet.
If chest, biceps and thigh each reach +2.0 cm by week 12, that is twice the spread, and the case is much stronger.
The tape is also useful when the scale is quiet.
In one narrative review, 10 weeks of resistance training may increase lean weight by 1.4 kg and reduce fat weight by 1.8 kg, in a review framed around inactive adults starting or restarting training (Westcott, 2012). That nets to roughly 0.4 kg lighter (our subtraction), so the scale may barely move. The tape is how you would check for yourself.
Common mistake: Measuring weekly and chasing a 0.5 cm move. At that size you are reading your tape technique, not your body. Wait for the four-week mark.
Use the tape to fill the gaps between body scans
A tape measure and a body scan answer different questions. The tape shows size at a site. The scan splits weight into fat and lean.
If you have both, read the scan with its margin in mind. In one study of lifters, a DEXA lean-mass change had to beat about 2.1 kg (4.6 lb) before it meant much, as the DEXA guide explains.
The InBody guide adds a caveat. In a 1,000-person study of healthy active-duty US Marines on the InBody 770, the visceral fat estimate didn't match DEXA and may be no better than a simple waist measurement. Read how to read InBody results for the detail.
A tape costs almost nothing, so you can take one every few weeks and use it to fill the gaps between scans. Read your lifts alongside it, using how to track progressive overload, because bigger arms with a flat bench is a different story from bigger arms with a rising one.
Log your tape measurements in Lifter Log
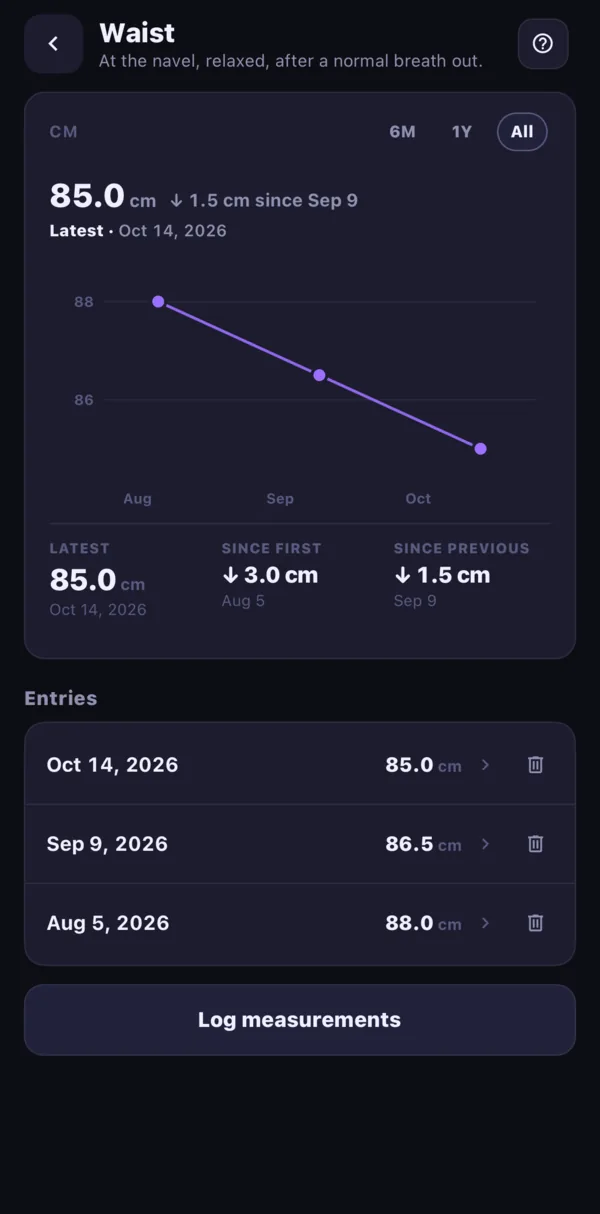
In Lifter Log, open Analytics, then Body, and use the tape section. There are nine sites to pick from: neck, shoulders, chest, waist, hips, biceps, forearms, thighs and calves. Chest, waist, hips, biceps and thighs are tracked by default.
You enter values in cm, or in inches when your length unit is feet. Each date holds one session, and values run from 10 to 250 cm. Each site gets a line chart with a dated list of entries, and the change since your first entry.
It logs numbers, not progress photos, which is enough for this routine.
Biceps, forearms, thighs and calves take a left and a right value, so measure both sides or the same side each time. Enter the average of your two passes, and keep the spread in your own notes.
For the body-scan side of the app, see the body section of the site. For how to write down lifts that sit beside it, see how to log workouts.